

Virtual pinball can appear daunting because vpinball itself is not a single application. Virtual pinball is an entire suite of awesome software, tables, backglasses, roms, videos, color files, and community creations all functioning together. However with the proper foundation in place you can run anything from classic VP9 tables all the way up to cutting edge VPX 10.8 tables without constantly battling bugs.
The objective is straightforward: create a clean virtual pinball configuration that launches tables correctly, points to the appropriate displays, and supports Color DMDs, B2S backglasses, PuP Packs, Future Pinball, and even 64-bit VPX tables.
Table of Contents
- Know the Main Virtual Pinball Terms
- Where to Find Tables, Help, and Updates
- Recommended PC Hardware for Virtual Pinball
- Prepare Windows, Displays, and NVIDIA Settings
- Install 7-Zip Before Handling Pinball Files
- Install the Baller Installer Base System
- Update B2S, PinUP, VPinMAME, DMD, and VPX Components
- Install a Table, Backglass, and ROM
- Configure VPX Graphics and Performance
- Fix and Configure DmdDevice.ini
- Add Tables to PinUP Popper
- Add Wheel Art and Loading Videos
- Record Your Own Popper Media
- Run One Table With B2S and Another With a PuP Pack
- Fix Common Backglass and DMD Problems
- Set Up a New VPX 10.8 Table With the GL Launcher
- Configure VPX Cabinet Buttons
- Edit a PuP Pack
- Respect the People Who Build This Hobby
- Frequently Asked Questions
Know the Main Virtual Pinball Terms
Before installing anything, it helps to know what each piece does. These names come up constantly when downloading and configuring tables.
- Baller Installer: The main installer package used to set up the core virtual pinball software, including PinUP Popper, PinUP Player, VPX, Future Pinball, VPinMAME, and related dependencies.
- PinUP Popper: The front end. This is the menu system that organizes tables, launches emulators, shows artwork and videos, and can also launch other systems such as Steam or Pinball FX.
- PinUP Player: The component that runs interactive videos and PuP Packs. It can react to ROM events and table scripts for additional visuals.
- VPX: Visual Pinball X, the main table engine for modern virtual pinball. Older VP9 content and current VPX tables may use different executables.
- Future Pinball: Another virtual pinball platform. With BAM installed, it has improved physics, arcade mode, and support for newer Future Pinball tables.
- BAM: Better Arcade Mode. It is a major enhancement for Future Pinball and is needed for many current tables.
- VPinMAME: The pinball ROM emulator. It runs the original machine software for supported real-world tables, including scores, sounds, game rules, and service menus.
- DMD: Dot Matrix Display. This is the score display used by many pinball machines for scores, animations, modes, and messages.
- DMDext: External DMD support that provides better DMD output, including colorization and support for FlexDMD and UltraDMD style displays.
- DmdDevice.ini: The main DMD configuration file. It controls placement, scaling, virtual DMD behavior, color options, and PuP integration.
- Alt Color: A colorization package that turns an originally monochrome DMD into a color DMD.
- Alt Sound: An alternate sound package for a table. These are optional and are enabled per ROM.
- FlexDMD: A modern display system for original scripted tables that need custom score displays, images, or video.
- DOF: DirectOutput Framework. Mainly for cabinet builds, allowing LEDs, solenoids, motors, fans, and other physical feedback devices to react to gameplay.
- B2S: Backglass Server. It powers animated backglasses, lighting effects, and sometimes full DMD displays.
- DirectB2S: The actual backglass file that belongs with a table.
- ScreenRes.txt: The B2S display configuration file that tells the backglass system where the playfield, backglass, and DMD screens are located.
Where to Find Tables, Help, and Updates
A virtual pinball setup lives and dies by the community around it. A few sites are especially useful when looking for tables, ROMs, backglasses, media, guides, and troubleshooting help.
NailBuster Wiki
The NailBuster Wiki is the main reference for PinUP Popper and PinUP Player. It contains detailed guides for display changes, front-end adjustments, emulator support, scripts, PC games, Pinball FX, and other PinUP features. If something needs to be added or changed in Popper, this is one of the first places to check.
VPForums
VPForums is home to a huge collection of Virtual Pinball content, including many tables updated for newer VPX versions. It is a good source for older releases, community uploads, and tables from long-running creators.
VPUniverse
VPUniverse is home to the VPW team and many of the newest high-end VPX projects. The downloads section includes tables, PuP Packs, media, backglasses, color files, and other important releases. If a new table is pushing VPX graphics and gameplay forward, there is a good chance it is being discussed there.
Future Pinball and TerryRed
For Future Pinball, TerryRed is one of the best resources around. Future Pinball used to have a reputation for light, floaty ball behavior, but BAM and newer physics work have improved it dramatically. There are now some incredible Future Pinball tables with advanced effects, video, and presentation.
Recommended PC Hardware for Virtual Pinball
Low-end PCs and single-board computers can run some virtual pinball content, but a smoother experience comes from giving the software enough power, especially with multi-screen cabinets, PuP Packs, high refresh displays, and newer VPX tables.
- For 1080p: At least a quad-core CPU, a GTX 1050 class GPU, and 16 GB of RAM.
- For 2K: A GTX 2070 class GPU or better is a safer target.
- For 4K: Aim for a 2080 Ti, RTX 3060, or better.
- Memory: 16 GB is strongly recommended. Eight GB can work for lighter setups, but high-end tables and video-heavy systems can run out of memory.
NVIDIA hardware is recommended here mainly because it tends to create fewer setup issues. AMD can work, but NVIDIA is usually the easier road for this type of build.
Prepare Windows, Displays, and NVIDIA Settings
Arrange the Screens Correctly
For a three-screen cabinet, the usual order is:
- Playfield: Primary display.
- Backglass: Second display.
- DMD: Third display.
The monitor numbers themselves do not matter as much as the arrangement. The displays need to be lined up across the top in Windows or NVIDIA display settings. Keep the playfield as the primary display, followed by the backglass and then the DMD.
Also keep Windows display scaling at 100 percent. Scaling can create all kinds of placement issues with B2S, Popper, DMD windows, and videos.
Use Full Dynamic Range
In NVIDIA Control Panel, go through each monitor and set output dynamic range to Full. Do the same under video color settings. This helps prevent washed-out output and the black-box transparency issues that can show up with T-Arc videos, Popper videos, and launch media.
Set Maximum Performance
Under NVIDIA Manage 3D Settings, set Power Management Mode to Prefer Maximum Performance. There is no need to start changing every other setting. This one is the important one.
Keep the Machine Clean During Setup
Windows updates and driver updates should be current before beginning. Once the install starts, pausing updates can prevent background processes and surprise popups from interrupting the setup.
For a dedicated offline pinball machine, some people also reduce Windows notifications and security interruptions. Only do that if the PC is truly dedicated to trusted pinball sources. If the machine is used for general browsing, downloads from unknown sources, or anything risky, keep normal security protections enabled.
Install 7-Zip Before Handling Pinball Files
Virtual pinball downloads come in plenty of ZIP, RAR, and 7z archives. Install the 64-bit version of 7-Zip first.
After installing it, set 7-Zip File Manager as the default app for compressed files. Right-click a ZIP file, choose Open with, select another app, browse to the 7-Zip program folder, choose 7zFM.exe, and set it to always use that app.
This keeps archive handling consistent and avoids unnecessary file-blocking problems later.
Install the Baller Installer Base System
Before installing, make sure the target drive does not contain an old, partial Virtual Pinball installation. A clean install is much easier than trying to repair a pile of old files.
The recommended location is:
C:\vPinball
Do not change that path during the Baller Installer setup. Accept the DirectX installation when it appears, and when the installer finishes, leave Run Config checked.
Choose the Correct Layout
In the Baller Installer configuration screen, select the layout that matches the system:
- Desktop
- Two-screen cabinet
- Slim DMD
- Real DMD
- Full DMD
Select 1080p for a 1080p setup. For anything above 1080p, use the 4K option in the layout tool. This includes 2K systems.
Apply the layout, confirm the screens are oriented and aligned correctly, then let the installer check the display layout and install the applications.
Position Popper Screens
In the display-position setup, place every Popper output in the correct location:
- Playfield on the playfield monitor
- Backglass on the backglass monitor
- Full DMD, music, apron DMD, and other DMD-related windows on the DMD monitor
If using a separate DMD display, make each DMD window full screen. If placing DMD content at the bottom of the backglass instead, every DMD window must use the exact same position and size. Write down the coordinate values if necessary.
Save the settings, apply them to all apps, then save the DMD settings to generate the initial configuration.
Update B2S, PinUP, VPinMAME, DMD, and VPX Components
A properly organized update package makes this much easier. Keep the update folders numbered and work through them in order. The basic pattern is simple: copy files into the matching destination, replace existing files when instructed, and run required registration tools as administrator.
Update and Register B2S Server
Copy the B2S Server update files into the Visual Pinball tables folder. Then find the B2S Backglass Server registration application, right-click it, and run it as administrator.
This registration step is important. Without it, DirectB2S backglasses may not work correctly.
Configure ScreenRes.txt
Open ScreenRes.txt and make sure it includes the playfield resolution and the backglass resolution. For example:
- 1080p playfield: 1920 by 1080
- 2K playfield: 2560 by 1440
Then run the ScreenRes Identifier tool. Choose the number of screens in the cabinet, request the recommended layout, verify that the playfield and backglass fill their displays, and enter the correct DMD position and size if using a full DMD monitor.
Save the settings. The ScreenRes file should now contain the correct playfield, backglass, and DMD values.
Update PinUP Player and Register PuP
Copy the 64-bit PinUP plugin and registration files into the required PinUP folders. Then run the PuP registration tool as administrator. The first time may appear to do nothing, but it still performs the registration.
Update VPinMAME and ROM Support
Copy the VPinMAME update files into the VPinMAME folder, including the new ROM support files, alt-color folder, alt-sound folder, and required plugins.
Run Setup64.exe and install it. In the default configuration:
- Enable Color DMD.
- Use External DMD rather than the standard internal DMD.
- Do not globally enable Alt Sound, because it can create low-volume issues for some ROMs.
Alt Sound should be enabled per table when wanted.
Install Color Plugins and FlexDMD
Copy the color plugin files and FlexDMD files into the VPinMAME folder. In the FlexDMD log configuration, change the logging level back to warn if it has been changed to trace or info.
Run the FlexDMD UI and register the missing components until the status indicators turn green.
Install Updated VPX Executables
After the VPX update files are copied into the Visual Pinball folder, there should be several executables available:
- A current 64-bit VPX executable
- A GL version for newer VPX 10.8 style tables
- A DirectX 64-bit option
- A 32-bit option for older tables that still need it
This is why the setup can run such a wide range of content. You are not locked into one table generation.
Update Popper Recorder
Copy the updated recorder executable and batch file into the PinUP System recordings folder. Once that is done, Popper Auto Record is ready to capture media for new tables.
Install a Table, Backglass, and ROM
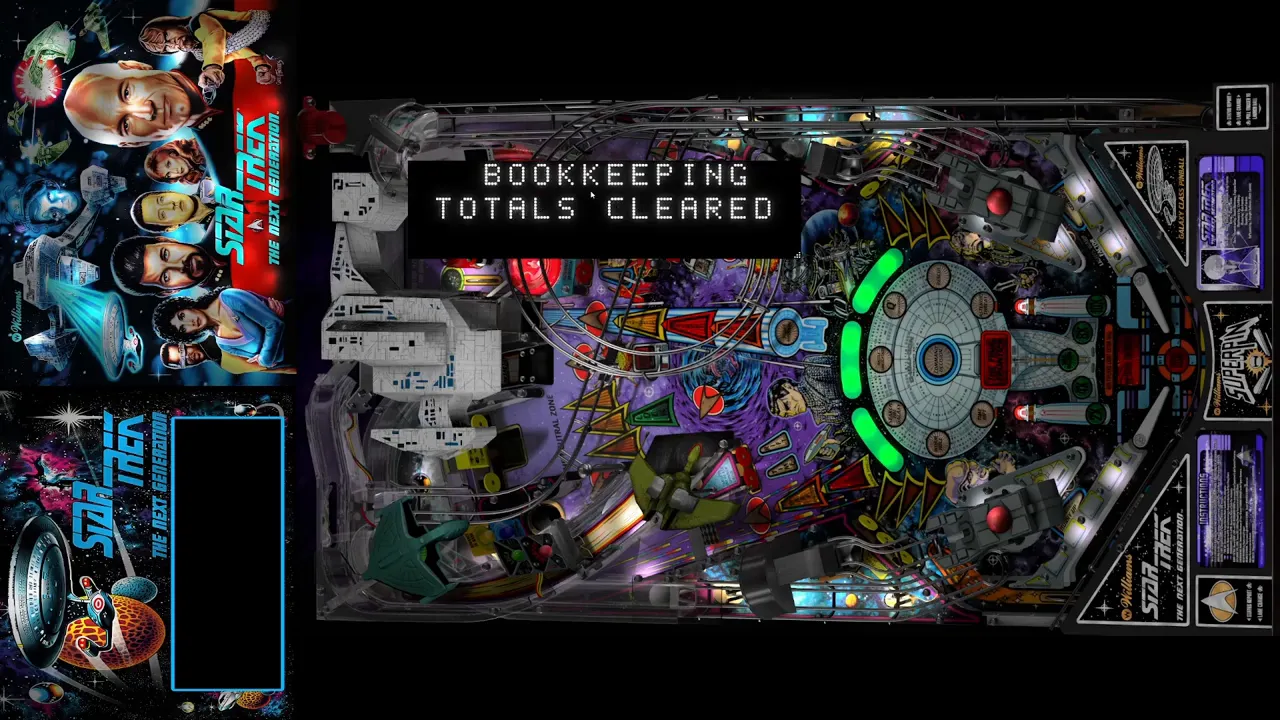
Star Trek: The Next Generation makes a good example because it can use a standard B2S setup or a PuP Pack setup.
Put Table and Backglass Files Together
Place the table file and its DirectB2S backglass file in the Visual Pinball tables folder. Rename both files to the same base name while keeping their extensions intact.
For example, the table might end in .vpx and the backglass in .directb2s. The names before those extensions should match exactly.
This keeps the tables folder clean and helps the system match the correct backglass to the correct table.
Find the Correct ROM
If a table launches and reports a missing ROM, open the table in the VPX editor and search the script for GameName. That value is the ROM name.
Search for that ROM name along with the word “ROM” on established virtual pinball sites. Once downloaded, place the ROM archive in:
C:\vPinball\VisualPinball\VPinMAME\roms
Do not unzip ROM archives unless a specific table instruction says otherwise.
First Launch Controls
When launching a ROM table for the first time, press F3 while the table has focus. This resets the ROM and creates its NVRAM data.
- 5: Insert coin
- 1: Start game
- Enter: Plunger
- Left and right Shift: Flippers
- Q twice: Exit table
- End: Coin door for many later Williams DMD tables
- 8 and 9: ROM volume controls while the coin door is open
Do not max out ROM volume. Set it reasonably high, then use the system volume and cabinet audio controls for the rest.
Configure VPX Graphics and Performance
Create shortcuts for the main VPX executable and the GL executable. Their preferences are separate, so configure both.
Standard VPX Settings
In the VPX editor settings, choose the correct resolution and enable fullscreen. Quality FXAA, anisotropic filtering, and cabinet anti-stretch are good starting points.
Ball trails are a personal choice, but they are not recommended here. When finished configuring and ready to play, enable Force Exclusive Fullscreen. That can help reduce lag.
GL Version Settings
The GL version may work best in windowed mode for some systems, though fullscreen is worth trying if performance is poor. Use quality FXAA, frame pacing, cabinet anti-stretch, and the recommended dynamic and static options. Leave the advanced 3D settings alone unless there is a specific reason to adjust them.
Fix and Configure DmdDevice.ini
The DmdDevice.ini file controls a lot of the DMD behavior. Open the standard DmdDevice.ini file in the VPinMAME folder, not the separate PuP-specific file.
Useful settings include:
- Scale to HD: Set to true for a smoother HD-style DMD look. Set it false if the classic square-dot look is preferred.
- Virtual DMD: Set to true.
- Always on top: Set to true.
- Ignore aspect ratio: Set to true when using a full-screen DMD display.
- Pin2DMD: Set to true when needed.
- PinUP: Set to true for PuP Pack support.
Saved ROM-specific DMD positions can be copied from an older configuration into the new file if needed.
Add Tables to PinUP Popper
Open the PinUP Popper configuration tool and go to Games Manager.
- Choose the Visual Pinball X system.
- Run a scan.
- Check the table that was added to the tables folder.
- Select Add Games to System.
Once added, the table can be launched from Popper. The arrow keys navigate the menu, and Enter launches the selected emulator or table.
Clean Up the Playlist
The main playlist does not have to show every system and every random game. Remove duplicate individual entries from the main playlist while leaving them inside their emulator category.
Hide systems that are not being used, such as Future Pinball, VPinMAME, or Pinball FX, by opening the playlist settings, unchecking visibility, and saving.
Adjust the Wheel Arc
If wheel images look too curved or too flat, open the Popper global configuration and adjust the wheel arc value. A value around 28 is a reasonable starting point.
Map Cabinet Controls
In Popper controller setup, map the important navigation functions:
- Game Start to the plunger or start button
- Next Game to the right flipper
- Previous Game to the left flipper
- Exit Emulator to the chosen exit button
- Page Next and Page Previous to MagnaSave buttons if available
Page navigation becomes very helpful once the library gets into the hundreds of tables because it can jump through the alphabet quickly.
Add Wheel Art and Loading Videos
Open Popper Media Manager to add wheel images, loading videos, playfield media, backglass media, and DMD media.
For a normal T-Arc loading video, select the media and use it directly. For a full-screen loading video, first add a blank HD media item, then add the loading video to the list and assign it to the playfield display. The blank item is what allows the full-screen presentation to work properly.
Mix and match however you like. A full-screen loading sequence looks great, while a T-Arc video can keep the playfield visible and add some flavor at the bottom of the screen.
Record Your Own Popper Media
Popper Auto Record can capture media for tables that do not already have it.
Open the recorder and choose what should be captured. For a three-screen build with a full DMD:
- Disable recording for screens that do not exist, such as topper or slim DMD.
- Enable backglass recording.
- Set playfield and full DMD recording to only capture missing media.
- Set a short recording length, such as 10 seconds.
- Use a short startup delay, such as five seconds, if the system loads quickly.
Scan the Visual Pinball X system, then start auto record. Do not touch controls while it runs. It launches tables, captures the missing media, exits, and moves to the next table automatically.
For a large collection, it can be left running for hours or overnight.
Run One Table With B2S and Another With a PuP Pack
Sometimes the same table is worth keeping twice: one version with its traditional B2S backglass and another version with a PuP Pack.
Start by copying the table file and renaming the copy with something clear, such as “PuP.” Then open that copied table in the VPX editor and change the GameName value slightly, for example by adding a letter to the ROM name.
Save the table, then create a matching PuP folder in:
C:\vPinball\PinUPSystem\PUPVideos
The PuP folder must be named after the modified GameName. Inside the VPinMAME folder, edit VPMAlias.txt and create an alias that maps the modified name to the real ROM name. This allows the copied table to use the original ROM while still receiving its own unique PuP Pack folder, color folder, and media.
Choose the PuP Pack Screen Layout
Most PuP Packs include setup options for different cabinet arrangements. Choose the option matching the system:
- Two-screen layout with DMD content on the backglass
- Three-screen layout with separate backglass and topper
- Full DMD layout
If the system has a full DMD but the video belongs on the backglass, choose the appropriate backglass configuration rather than forcing it onto the DMD display.
Copy Color and Alt Sound Files Per Alias
If the duplicated PuP table uses a modified GameName, copy the alt-color folder and rename it to the new alias. The same idea applies to alt sounds if they are being used.
Alt sounds are optional. If installed, place the folder inside the VPinMAME AltSound directory and name it after the alias. Lower ROM volume if the alt-sound package is much louder than the original game audio.
Fix Common Backglass and DMD Problems
Backglass Appears When It Should Not
If a PuP table launches a B2S backglass unexpectedly, right-click the backglass and enable Exact DirectB2S Match. Save the settings and restart.
Double DMD or Double Scoring
Some tables use a full DMD through B2S. In that situation, the external DMD may need to be disabled for that specific ROM.
Open VPinMAME Setup64, test the ROM, open Game Options, and uncheck External DMD. This prevents two score displays from appearing at the same time.
DMD Is in the Wrong Place
Move the DMD window to the desired location, then right-click it and save the position globally or per ROM. Use global placement for most tables and per-ROM placement for exceptions.
Table Starts Sideways or Uses the Wrong POV
For newer VPX 10.8 tables, open the table in the editor and press F6. If the table orientation is wrong, use the plunger or Enter key to reset it. Adjust X, Y, Z, and size until the playfield fits the screen properly, then save the table.
Lights Need More Pop
In the table editor, use the day and night slider to darken the table slightly. A darker playfield can make the inserts and lighting stand out more. Then adjust bloom under the lights settings. Start low, around 0.5 to 1.0, and find what looks right for that particular table.
Set Up a New VPX 10.8 Table With the GL Launcher
Some newer tables need the GL executable. Add alternate launchers in Popper by entering the executable names in the alternate launcher list, including the GL version and, if wanted, the DirectX 64-bit and 32-bit versions.
Then add the new table through Games Manager. Open that game’s settings, choose the alternate launcher field, select the GL executable, and save. From then on, Popper will launch that table using the proper VPX executable.
Configure VPX Cabinet Buttons
To find the button numbers from a USB controller board, search Windows for Set up USB game controllers. Open the controller properties and press each physical button. Write down the number shown for the plunger, flippers, start button, MagnaSave buttons, and any other controls.
Then open VPX Preferences and choose Configure Keys, Nudge and DOF. Enter the correct controller button numbers for each action.
The plunger and lockbar fire action can use the same button. Map left and right flippers, start, coin, MagnaSave, and other cabinet functions based on the control board numbers.
If the ball seems to drift or nudge by itself, check for a connected joystick with stick drift. A drifting analog controller can influence gameplay and make the ball move toward one side of the table.
Edit a PuP Pack
Open PinUP Pack Editor and load the specific PuP Pack. From there, individual screens can be turned off, shown, hidden, or moved depending on the setup.
Volume can also be adjusted. If PuP audio is too loud, lower it. If it is meant to stay in the background, a middle range around 50 to 60 can work well. Save the PuP Pack after making changes.
Respect the People Who Build This Hobby
Virtual pinball is not a one-click hobby because it is not built by one person or one company. It is the work of hundreds of people making tables, backglasses, PuP Packs, colorizations, physics updates, media, scripts, tools, guides, and support resources.
When downloading a table, backglass, PuP Pack, or color file, take a second to leave a like or a thank-you for the people who made it. Most of this work is shared freely, and a little appreciation goes a long way.
Frequently Asked Questions
Do I need a three-screen cabinet to use virtual pinball?
No. Virtual pinball can run on a desktop, a single screen, two screens, or a full three-screen cabinet. A three-screen layout gives the most complete cabinet presentation with separate playfield, backglass, and DMD displays.
Where do VPX ROM files go?
Place ROM archives in the VPinMAME ROMs folder, normally located at C:\vPinball\VisualPinball\VPinMAME\roms.
Why is my VPX table asking for a missing ROM?
Open the table in the VPX editor, search the script for GameName, and use that value to find the required ROM. Download the matching ROM from established virtual pinball sources and place it in the ROMs folder.
Why do I see two DMD score displays?
The table may be using a full DMD through its B2S backglass while VPinMAME is also sending output to External DMD. Open that ROM in VPinMAME Setup64 Game Options and disable External DMD for that game.
How do I reset a ROM on its first launch?
Click the active playfield window and press F3. This resets the ROM and creates the initial NVRAM data.
Can I use a PuP Pack and a B2S backglass for the same table?
Yes. Make a copy of the table, give the copy a modified GameName alias, create a matching PuP folder, and add the alias to VPMAlias.txt so both table versions can use the same real ROM independently.
What is the easiest way to add media for a table?
Use Popper Media Manager for wheel art and downloadable media. For missing playfield, backglass, and DMD videos, use Popper Auto Record to launch the table and capture media automatically.
Should I use the standard VPX executable or the GL version?
Use the executable required by the table. Older and standard tables may run through the normal VPX launcher, while newer VPX 10.8 content may need the GL version. PinUP Popper can assign a specific alternate launcher per table
Lance has been building and tinkering with virtual pinball cabinets for years. As the founder of PinballCabinet.com, he's spent countless hours dialing in software stacks, chasing DMD placement bugs, and hunting down ROMs so you don't have to. When he's not configuring PinUP Popper or testing the latest VPX 10.8 tables, he's helping other enthusiasts get their builds running right.